一、playbook介绍
playbook(剧本): 是ansible用于配置,部署,和管理被控节点的剧本。
参考:https://docs.ansible.com/ansible/latest/user_guide/playbooks_intro.html
使用的格式为yaml格式(saltstack,elk,docker等也都会用到yaml格式)
1
2
3
4
5
6
7
8
9
10
11
12
13
14
| 树明的理解:
playbook:ansible格式的脚本。将所有需要执行的操作按照ansible的编程语法,放到文件中执行。
playbook替代方案
1)、完全可以用shell脚本来替代playbook
将所有的ansible命令放入脚本 shell脚本中写的是ansible指令
#!/bin/bash
for IP in `seq 201 203`
do
ansible -m hostname 192.168.98.$IP -a "name=node${IP}"
done
2)、ansible+shell脚本 使用script模块
ansible -m script group2 '/etc/ansible/srcipts/nginx_install.sh'
|
1.1、YAML格式规则
- 文件的第一行以 “—“开始,表明YMAL文件的开始.
- 以#号开头为注释
- 列表中的所有成员都开始于相同的缩进级别, 并且使用一个
"- " 作为开头(一个横杠和一个空格)
- 一个字典是由一个简单的
键: 值 的形式组成(这个冒号后面必须是一个空格)
- 注意: 写这种文件不要使用tab键,都使用空格
参考: https://docs.ansible.com/ansible/latest/reference_appendices/YAMLSyntax.html#yaml-syntax
下面看一个官方的示例感受一下
1
2
3
4
5
6
7
8
9
10
11
12
13
14
15
| ---
# 一位职工记录
name: Example Developer
job: Developer
skill: Elite
employed: True
foods:
- Apple
- Orange
- Strawberry
- Mango
languages:
ruby: Elite
python: Elite
dotnet: Lame
|
playbook实例
先直接来看一个实例 apache安装及业务初始化
第1步: 创建一个存放playbook的目录(路径自定义)
1
| [root@manage01 ~]# mkdir -p /etc/ansible/playbook/web
|
第2步: 准备httpd配置文件,并修改成你想要的配置
1
2
3
4
| [root@manage01 ~]# yum install httpd -y
按需要修改你想要的配置(为了测试可以随意改动标记一下)
[root@manage01 ~]# vim /etc/httpd/conf/httpd.conf
|
第3步: 写一个playbook文件(后缀为.yml或.yaml)
1
2
3
4
5
6
7
8
9
10
11
12
13
14
15
16
17
18
19
20
21
22
23
24
25
26
27
28
29
30
31
32
33
34
35
36
| [root@manage01 web]# cat apache.yaml
---
- hosts: group1
remote_user: root
vars:
- user: test
tasks:
- name: create user use variable
user: user=test state=present
- name: install httpd server
yum: name={{item}} state=latest
with_items:
- httpd
- httpd-devel
- name: start httpd service
service: name=httpd state=started enabled=yes
- name: copy httpd.conf to group1:/etc/httpd/conf/
copy: src=/etc/ansible/playbook/web/httpd.conf dest=/etc/httpd/conf
notify:
- restart httpd service
handlers:
- name: restart httpd service
service: name=httpd state=restarted
#tasks
#1、创建apache管理用户
#2、安装httpd
#3、服务启动管理
#4、拷贝配置文件,业务初始化
#5、触发重启服务httpd
|
第4步: 执行写好的palybook
- 会显示出执行的过程,并且执行的每一步都有ok,changed,failed等标识
- 执行如果有错误(failed)会回滚,解决问题后,直接再执行这条命令即可,并会把failed改为changed(幂等性)
1
| [root@manage01 web]# ansible-playbook /etc/ansible/playbook/web/apache.yaml
|
1.2、Playbook常见语法
hosts: 用于指定要执行任务的主机,其可以是一个或多个由冒号分隔主机组.
remote_user: 用于指定远程主机上的执行任务的用户.
1
2
| - hosts: group1
remote_user: root
|
tasks: 任务列表, 按顺序执行任务.
- 如果一个host执行task失败, 整个tasks都会回滚, 修正playbook 中的错误, 然后重新执行即可.
1
2
3
4
5
6
7
8
9
10
11
12
13
| tasks:
- name: create user use variable
user: name={{user}} state=present
- name: install httpd server
yum: name=httpd state=latest name=httpd-devel state=latest
- name: start httpd service
service: name=httpd state=started enabled=yes
- name: copy httpd.conf to group1:/etc/httpd/conf/
copy: src=/opt/httpd.conf dest=/etc/httpd/conf/
|
handlers: 类似task,但需要使用notify通知调用,实现按需调用。
- 不管有多少个通知者进行了notify,等到play中的所有task执行完成之后,handlers也只会被执行一次.
- handlers最佳的应用场景是用来重启服务,或者触发系统重启操作.除此以外很少用到了.
1
2
3
4
5
6
7
8
| notify:
- restart httpd service
handlers:
- name: restart httpd service
service: name=httpd state=restarted
#注意: handlers 需要notify调用,他和tasks不同的是 tasks每次都会调用,heandlers触发才调用,比如配置文件修改了,在执行playbook的时候,就会将管理机上的新改的copy到被管理机,那么就会触发headlers重启服务,否则不会执行heanlers
|
练习: 修改httpd的端口为8080,再执行playbook测试
variables: 变量
with_items: 迭代列表
- 其使用格式为将需要迭代的内容定义为item变量引用,并通过with_items语句指明迭代的元素列表即可。
例如安装多个软件包
1
2
3
4
| yum: name={{item}} state=latest
with_items:
- httpd
- httpd-devel
|
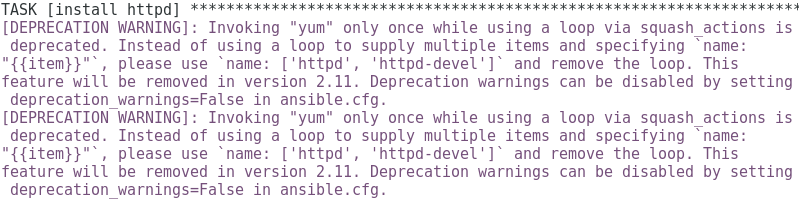
执行后有如下警告

解决方法:
在/etc/ansible/ansible.cfg配置文件里的[default]配置段下面加上deprecation_warnings=False参数即可
二、练习案例
写一个playbook实现
- 配置yum
- 安装vsftpd包
- 修改配置文件(要求拒绝匿名用户登录)
- 启动服务并实现vsftpd服务开机自动启动
1
2
3
4
5
6
7
8
9
10
11
12
13
14
15
16
17
18
19
20
21
22
23
24
25
| ---
- hosts: group1
  remote_user: root
tasks:
- name: rm yum repository
file: path=/etc/yum.repos.d/ state=absent
- name: 同步master上的yum源到group1
copy: src=/etc/yum.repos.d dest=/etc/
- name: ensure vsftpd is at the latest version
yum: name=vsftpd state=latest
- name: write the apache config file
copy: src=/etc/vsftpd/vsftpd.conf dest=/etc/vsftpd/vsftpd.conf
notify:
- restart vsftpd
- name: ensure vsftpd is running (and enable it at boot)
service: name=vsftpd state=started enabled=yes
handlers:
- name: restart vsftpd
service: name=vsftpd state=restarted
|